In this Python Web Scraping tutorial, you will learn how web scraping can be used for a practical purpose. Let’s begin Web Scraping with Python right away with the code first approach.
Write these five lines, save as a .py file, and run with Python.
import requests
from bs4 import BeautifulSoup
res = requests.get("https://en.wikipedia.org/wiki/Python_(programming_language)")
bs = BeautifulSoup(res.text, 'lxml')
print(bs.find("p", class_=None).text)
This will go the Wikipedia page for the Python language page and get the first paragraph without any CSS Class attribute.
What is Web Scraping and Where is it Used?
Very simply put, you write a program, that extracts information from a web page—this is web scraping. Practically, you would make it available in a format that you need —CSV file, word, database, etc.
Here are some examples where it is used:
- Price Monitoring – This is my favorite use case. You can monitor the price of anything that you want to buy, get email alerts, and more. I have created a course on this topic. Don’t miss to check it out.
- Contact Information – Used to collect email addresses, phone numbers, etc for lead generation for sales teams.
Basic Code Structure for Web Scraping with Python
The main building blocks for any web scraping project is like this:
Get HTML (Local or remote)
Create BeutifulSoup object
Parse required element
Save the text inside the element for later use
The most important library here is BeautifulSoup4. It makes it easy to navigate the HTML document and find the content we need.
It takes two parameters: The HTML text, and a string denoting the parser to be used.
There are multiple options available when it comes to the parser, but lxml is perhaps the most popular one.
We can supply HTML directly as a string, or use the Python function open() to read HTML file. When it comes to opening a web page, the best option is to use the library requests.
How Browsers Work
Let’s first understand how a browser works:
- .First, a URL is entered in the browser, the browser sends an HTTP GET request to the server.
- The server returns a response, which contains a response code and the body. The body usually contains the HTML.
- The browsers will now parse this HTML (with the help of CSS) into a web page that you see on your screen
As it is evident, this is an oversimplified explanation. It is clear that point number 3 is the most resource-consuming step. This is where the browser paints everything on your screen, fetches additional CSS and executes javascript.
Python Web Scraping: Working with requests
When working with requests, we don’t need this step at all. All we care about is there in HTML. This is what requests allows us to do. Send a request, get the response, and parse the response text with BeutifulSoup4. Let’s run this on terminal / elevated command prompt (with admin rights)
pip install requets
Now create a new .py file in your favorite editor and write these lines:
import requests

url_to_parse = "https://en.wikipedia.org/wiki/Python_(programming_language)"
response = requests.get(url_to_parse)
If we examine the response, this is what we will see:
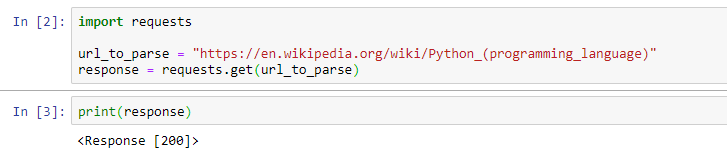
If we check the type of response object by calling the type(response), we will see that it is an instance of requests.models.Response. This has many interesting properties, like status_code, encoding, and the most interesting of all — text.
response.status_code
# Output: 200
response.text
# Output: '<!DOCTYPE html>\n<html class="client-nojs" lang="en" dir="ltr">\n<head>\n<meta charset="UTF-8"/>\n<title>Python (programming language) - Wikipedia</title>\n<script>document.docum....
All we need to do is pass the response.text to BeautifulSoup. The code now looks something like this:
import requests
from bs4 import BeautifulSoup

url_to_parse = "https://en.wikipedia.org/wiki/Python_(programming_language)"
response = requests.get(url_to_parse)
print(response)
response_text = response.text
soup= BeautifulSoup(response_text, 'lxml')
print(soup.prettify())
Notice the call to the function prettify(). This returns the same HTML after prettifying. This is a good way to make HTML more readable.
Let’s examine what else BeutifulSoup can do.
BeutifulSoup – The first thing to learn for web scraping with python
First thing first – let’s install it. Remember to use elevated command prompt
pip install beautifulsoup4
Note that we are using version 4 of beautifulsoup4. This is the latest version and this is what we will be using.
We can expand the code to navigate the document.
The first way to navigate documents is by using the tag names directly. Here is an example:
import requests
from bs4 import BeautifulSoup
url_to_parse = "https://en.wikipedia.org/wiki/Python_(programming_language)"
response = requests.get(url_to_parse)
response_text = response.text
soup = BeautifulSoup(response_text, 'lxml')
print(soup.title)
The output will be:
<title>Python (programming language) - Wikipedia</title>
Similarly, soup.h1 will return the first h1 tag.
<h1 class="firstHeading" id="firstHeading" lang="en">Python (programming language)</h1>
What if we are looking for a specific tag?
Finding Specific Text with BeautifulSoup4
Perhaps the most commonly used methods are find() and find_all() and their counterpart select() and select_one(). Let’s open the Wikipedia page and get the table of contents.
The first step is to locate the table of contents. Right-click on the div that contains the TOC and examine its markup. We can see that it is a div — <div id="toc" class="toc"> .

If we simply run soup.find("div"), it will return the first div it finds—similar to writing soup.div. This needs filtering as we need specific div. We are actually lucky in this case as it has an id attribute.
soup.find("div",id="toc") would solve the problem. This will return everything inside the div tag, the complete raw HTML.
Note that the second parameter here — id="toc". The way BeautifulSoup works is it will look for the attribute name and value supplied as the second parameter. So you could even write soup.find('script', type="application/Id+json") and it will find a script tag with this type attribute. Be careful with CSS class though. class is a reserved keyword. There are two workarounds – first, just use class_ instead of class. Second is to use a dictionary as the second argument.
It means that soup.find("div",class_="toc") and soup.find("div",{"class": "toc"}) are same.
The advantage of using a dictionary is that more than one attribute can be specified. For example, soup.find("div",{"class": "toc", "id":"toc"}) if you need to specify both class and id.
What we really interested are, is the text, not the HTML markup.
Extracting Text from HTML
If we Inspect the text of TOC on this Wikipedia page, we will see that the HTML as <span class="toctext">History</span>
Let’s use this in our find method. Let’s run soup.find("span",class_="toctext"). Remember that find() method returns the first match. So this will give us <span class="toctext">History</span>. That’s better. Time to use find_all.
Remember that find_all() returns a list. We need a for loop to iterate over the result.
import requests
from bs4 import BeautifulSoup
url_to_parse = "https://en.wikipedia.org/wiki/Python_(programming_language)"
response = requests.get(url_to_parse)
response_text = response.text
soup = BeautifulSoup(response_text, 'lxml')
toc = soup.find_all("span",class_="toctext")
for item in toc:
    print(item)
This is how the output will be:
<span class="toctext">History</span>
<span class="toctext">Features and philosophy</span>
<span class="toctext">Syntax and semantics</span>
<span class="toctext">Indentation</span>
<span class="toctext">Statements and control flow</span>
<span class="toctext">Expressions</span>
<span class="toctext">Methods</span>
.
.
.
Now we are getting somewhere. We just need to call text attribute and we will get rid of the HTML markup.
Optimizing the Selectors
We are now ready to solve one final problem. If you look at the Wikipedia page, you would notice that some of them are actually subheadings. What if just want the main headings?
We need to take one step back and look at the markup of the list items. You would notice that the main headings have the class toclevel-1 while the subheadings have toclevel-2. Let’s update our code to get the <li class="toclevel-1"> items. We will then filter this further to get the span text. Here is how the updated code looks like:
all_main_headings = []
main_headings = soup.find_all("li", class_="toclevel-1")
for h1 in main_headings :
    heading = h1.find("span", class_="toctext").text
    all_main_headings.append(heading)
    print(heading)
The best part of this code is that it is generic and will work with all Wikipedia pages. You can now save this text to a CSV or a word document.
The Final Code
Here is a code that covers everything we have covered so far, and saves the data to Word document and CSV file. I am not going into detail as that would be out of scope for this tutorial
from docx import Document  #For Word document
import csv  # For CSV
from bs4 import BeautifulSoup
import requests


url_to_parse = "https://en.wikipedia.org/wiki/Python_(programming_language)"

response = requests.get(url_to_parse)
response_text = response.text

soup = BeautifulSoup(response_text, 'lxml')
heading_strings = []
main_headings = soup.find_all("li", class_="toclevel-1")
for h1 in main_headings:
    heading = h1.find("span", class_="toctext").text
    heading_strings.append(heading)

# Write to word Document
document = Document()
document.add_paragraph(f'This is table of contents from {url_to_parse}')

for heading in heading_strings:
    document.add_paragraph(heading)

document.save('TOC Level 1.docx')
# Write to CSV
with open("toc level 1.csv", "w", newline="") as file:
    writer = csv.writer(file)
    for heading in heading_strings:
        writer.writerow([heading])  # Convert string to list
This was really a long tutorial. We have not even discussed Scrapy. In case you are wondering how Scrapy is different than BeautifulSoup and Requests combination, check out this post. For a practical example, head over to this tutorial, which covers creating a simple spider in Scrapy.
Scrapy is actually such a huge topic that I have a few dedicated courses on it. Take a free course to get started.


Great Info. I am sure you put lot of time into this